Showing posts with label DIY. Show all posts

Sunday, November 9, 2014

Dog Coats for My Yorkie

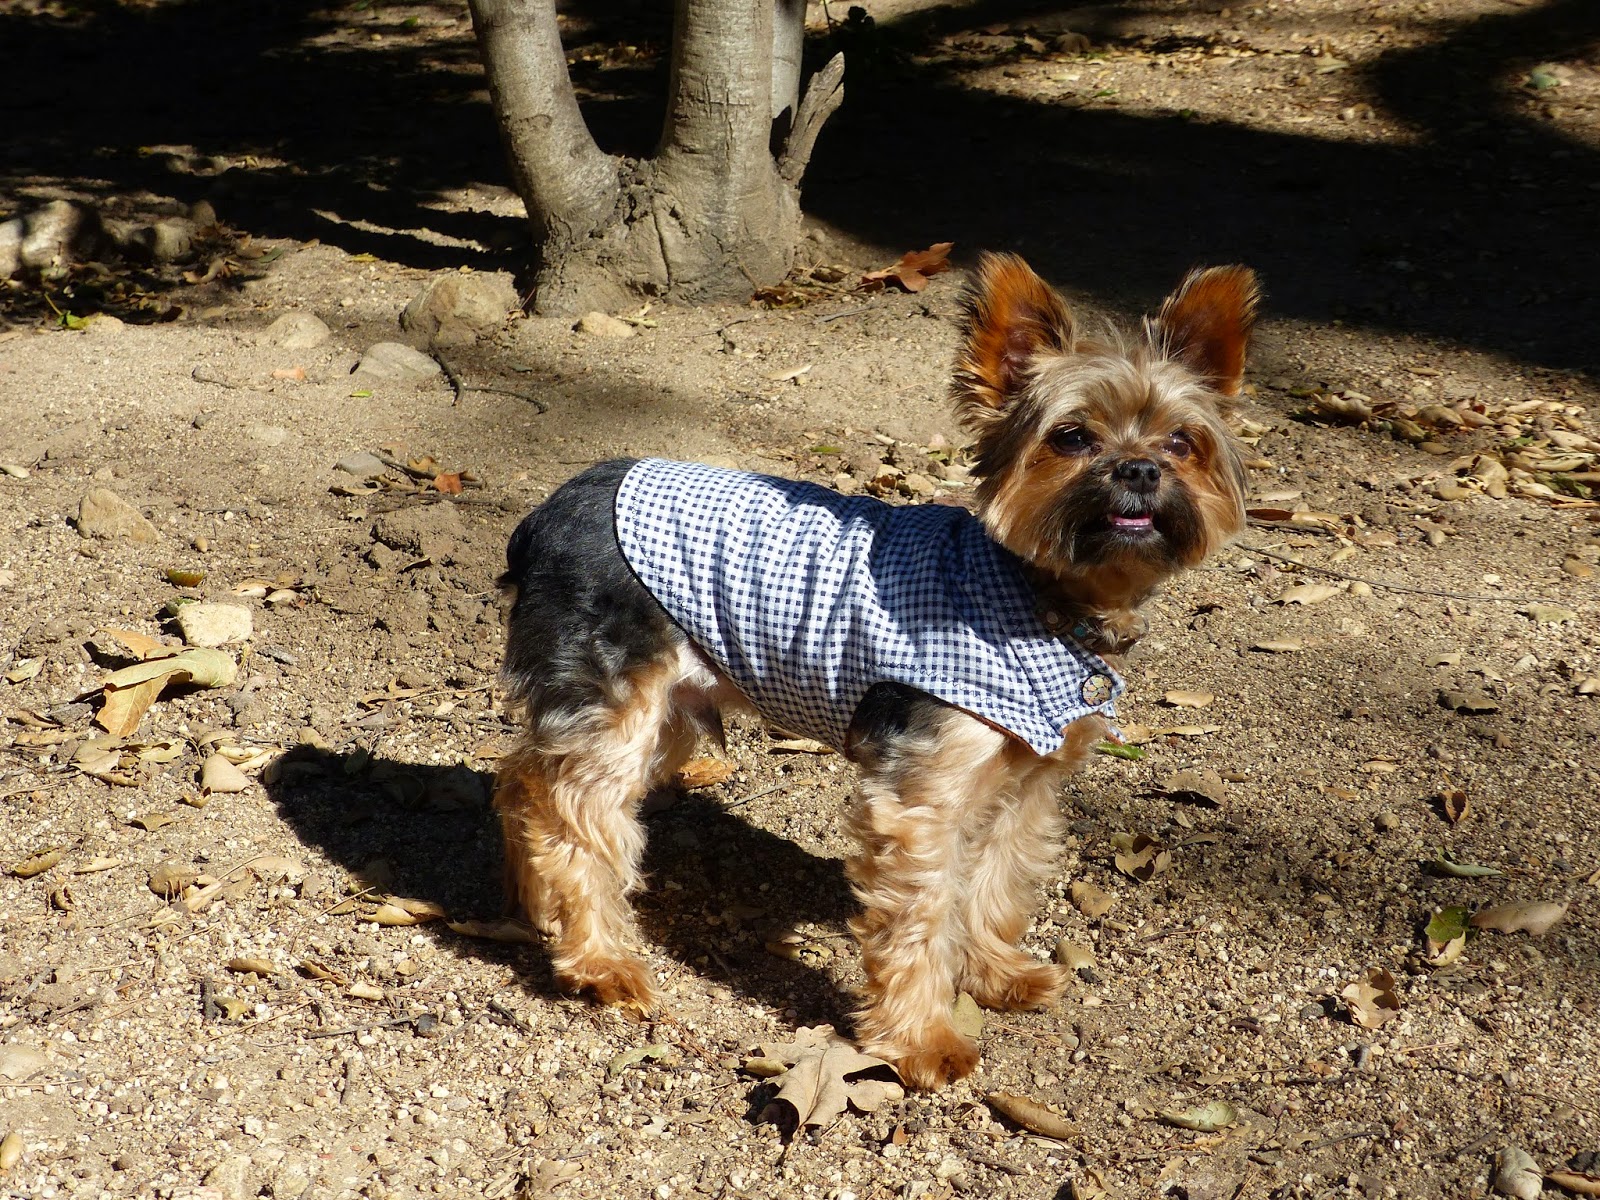
A button secures the collar
My latest sewing craze has been to create little dog coats for my 5-pound Yorkshire Terrier named Raleigh.

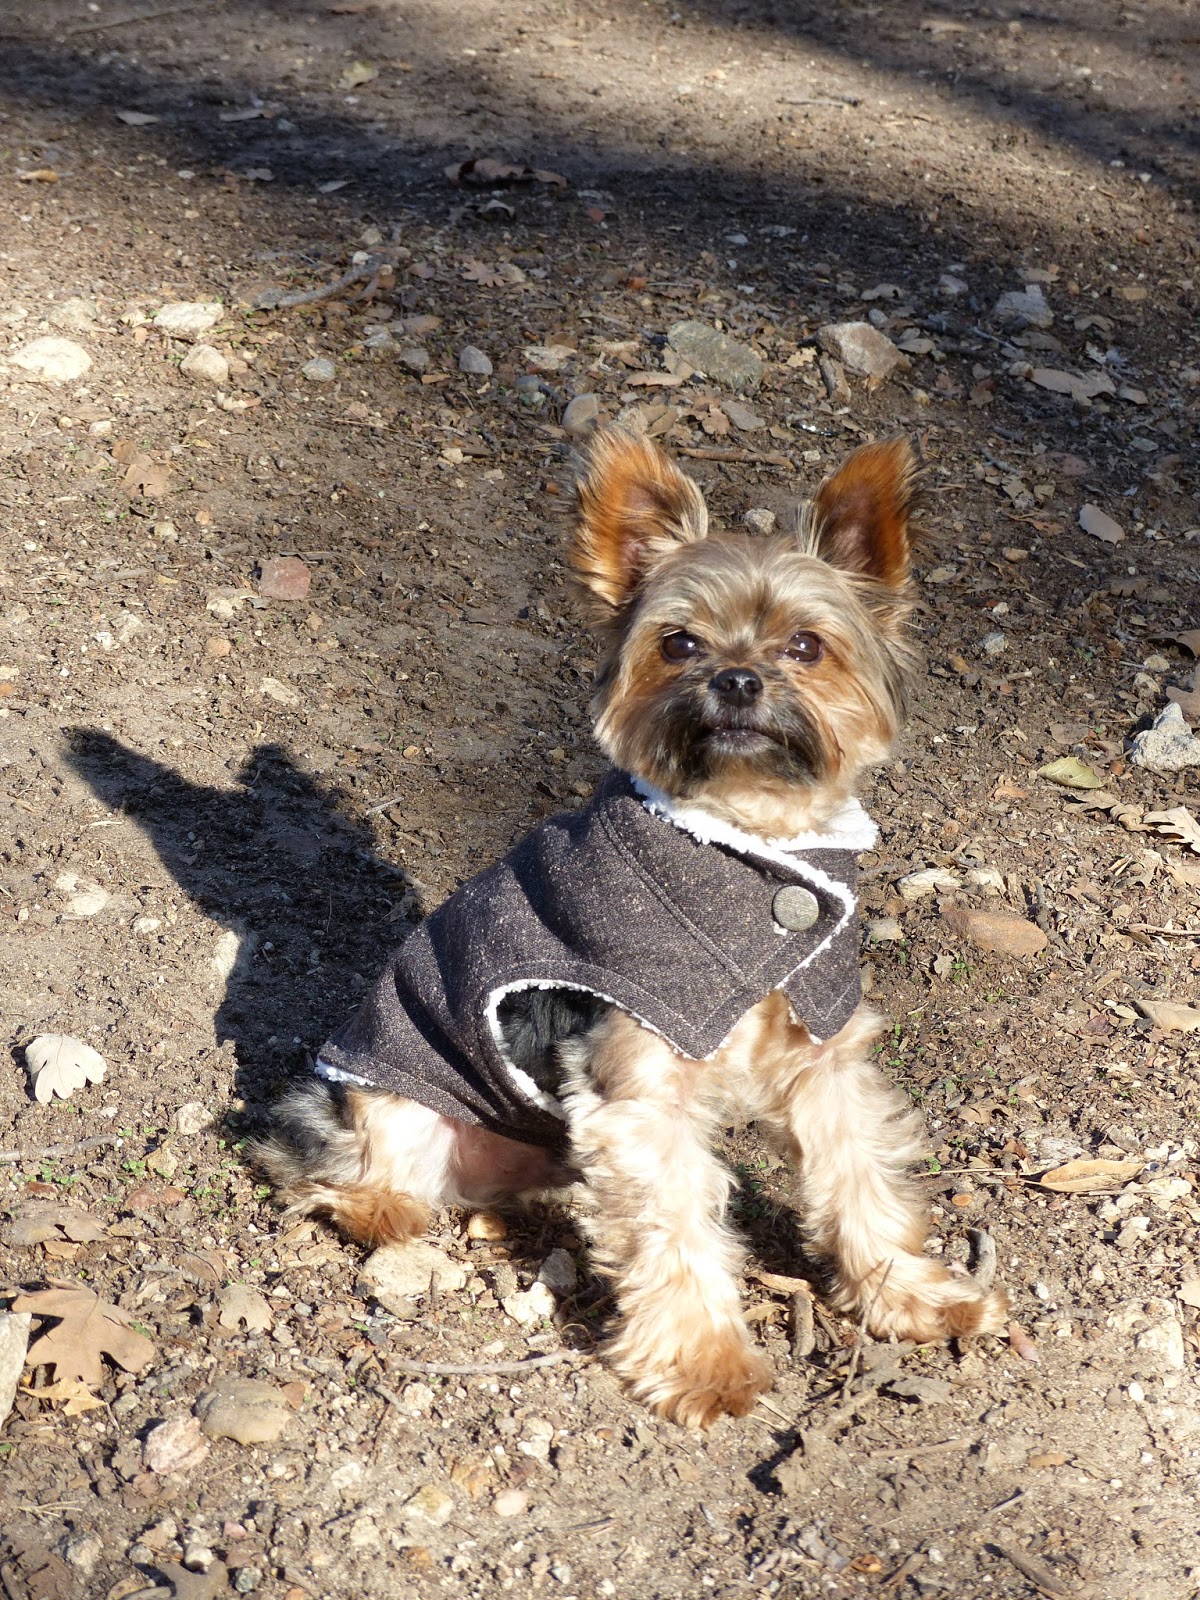
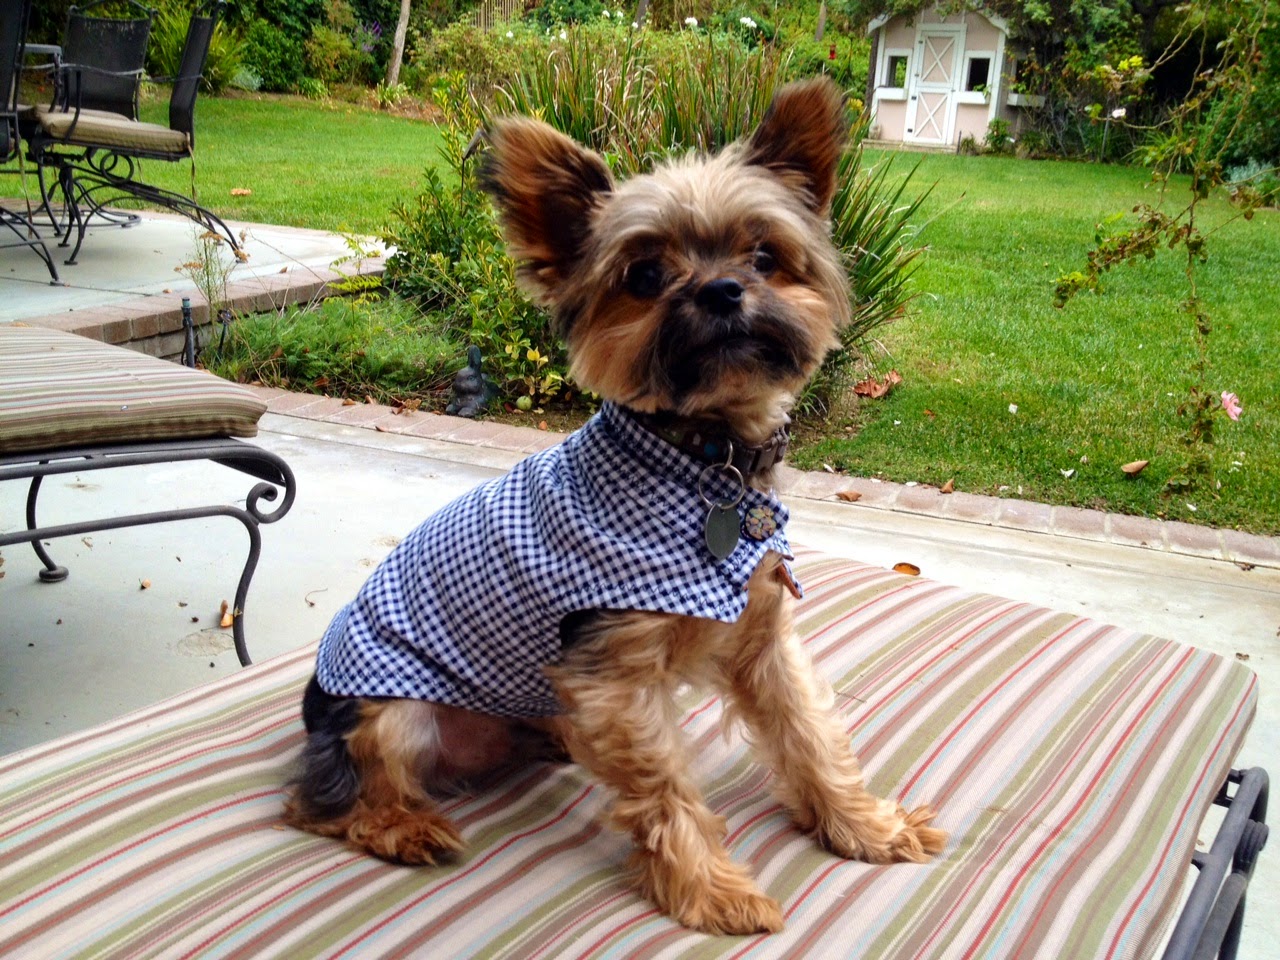
Since I like to keep him groomed in a puppy cut, he doesn't have lots of hair to keep him warm in cooler temperatures, therefore he needs to wear a coat when the weather turns.  Since we are finally getting temps in the 50's at night, for heaven's sake it is November, he needs a coat to keep him warm.

I pulled out a few remnants and sketched out a pattern and in no time I had a cute little coat.  I had to improvise a little along the way since I didn't really know what I was doing but I am happy with the results.

Since the fabric was stretch on one side and woven on the other, I couldn't pull it over his head so I added a button hole and button to secure it.  He is docile and patient so it's no trouble buttoning the collar under his chin.  Plus I think the button adds a little flair.  You can't really see the rusty colored light weight knit on the underside, but I wanted a contrasting color and something soft up against him.

 
Next up I sewed a second coat with a nubby brown wool-like exterior fabric and cream fuzzy interior fabric. What a mess that stuff was to cut and sew.  My black pants and top were covered with little white pieces of fuzz.  I sewed the collar a little differently this time.


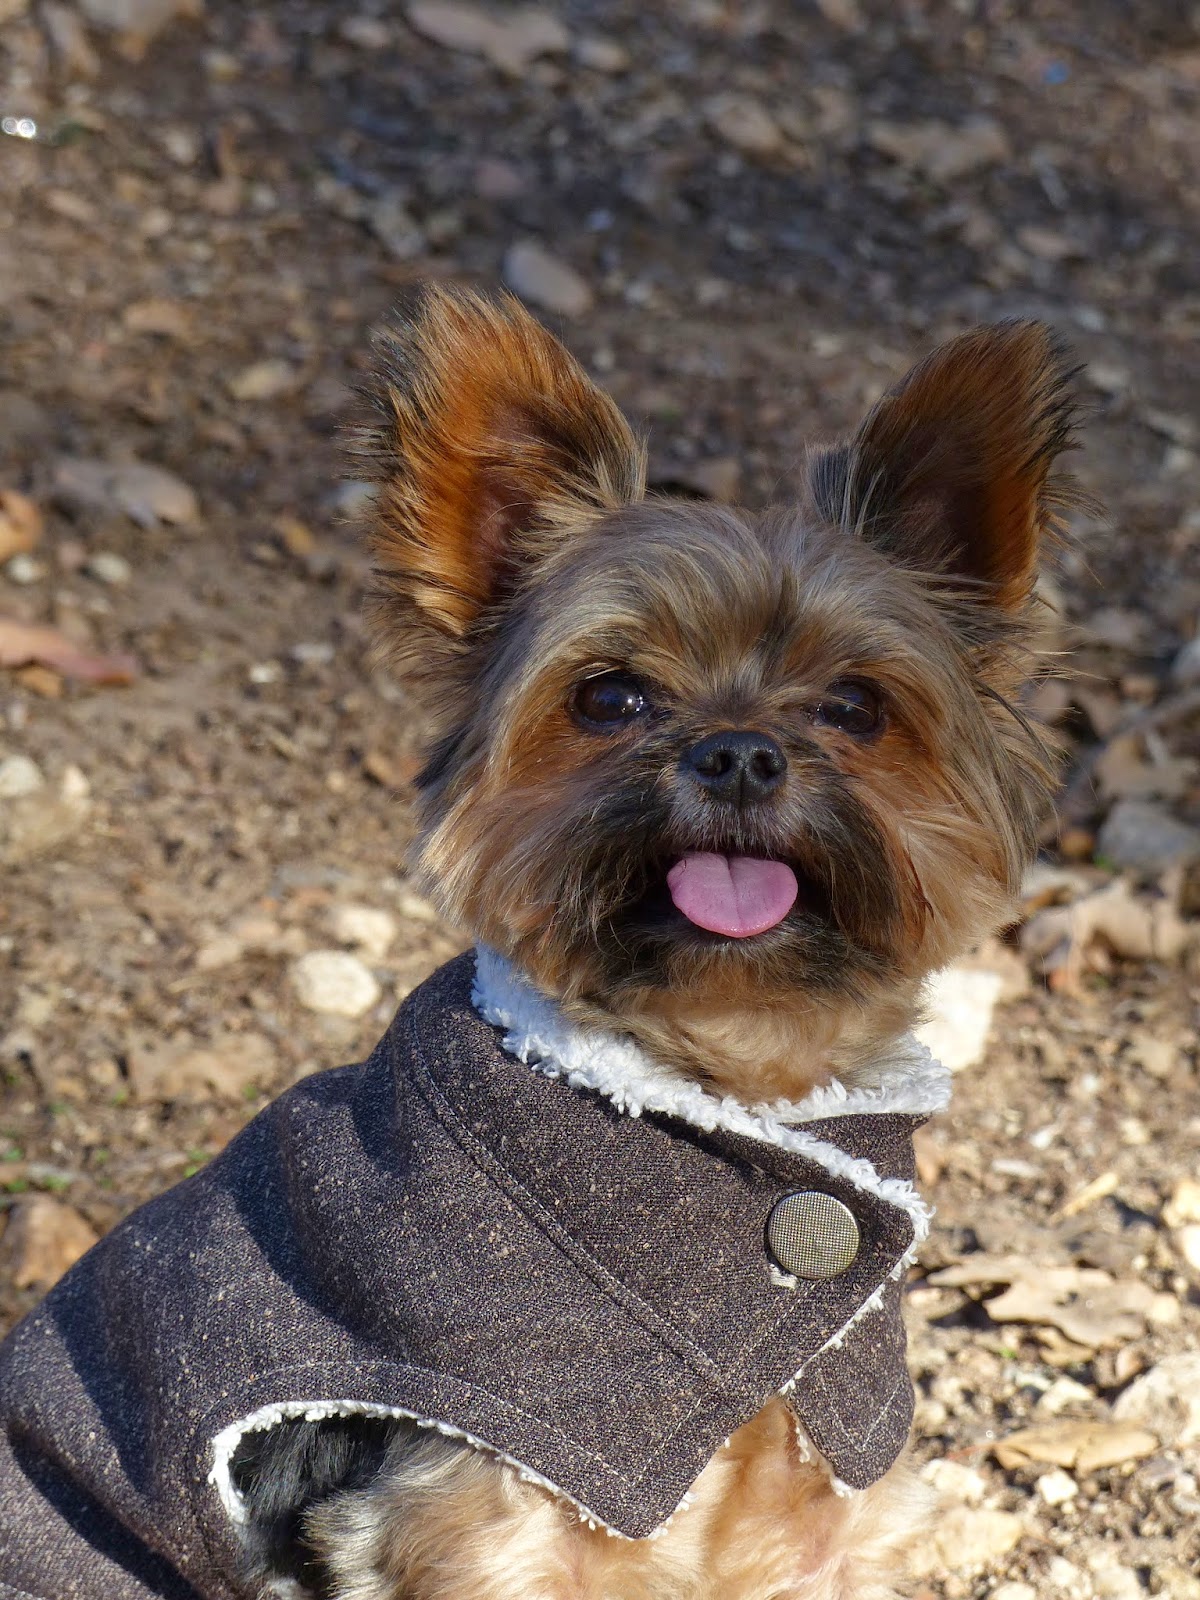
I think it turned out so cute and Raleigh looks very dapper in it.

I solicited the measurements of my brother's and sister's dogs, Mollie, Rigby, Lucky and Buster and I should have a few coats ready for Christmas gifts.  I will post the coats on their respective recipients after the holidays.

Email me at pearlscottage@sbcglobal.net if you are interested in a custom dog coat.

Saturday, December 7, 2013

A Partridge in a Pear Tree - Fun Holiday Decor


Easy to sew birds made with quilt fabric make fun holiday decor.

This year I made a few dozen holiday decorations for home and work.  I found a pattern in a quilting book for little partridges made from three different fabrics and stuffed with lizard litter, which is ground walnut shells.  The original pattern created little birds, I'm talking really little, so I made two larger sizes as well.
My six fabrics
I picked up six different fabrics, just 1/3 yard of each, at the local fabric store and went to work.  I created a template of the bird bodies and another template of the bird bases.  I cut out different fabrics for different parts in different sizes.  The cutting was easy and the sewing was easy, especially with my quilting foot to measure the quarter inch seams.  After sewing a number of birds together and leaving a small area open at the base, I was ready for the lizard litter.  It is strange stuff that reptiles love - think what is on the bottom of an aquarium that mimics the desert.  The texture is more course than sand but just as hard to clean up so I did this part of the project in my backyard.


Since I had made the birds larger than the pattern recommended, I realized that if I filled them with only lizard litter then they would be quite heavy and a handy weapon if needed.  Instead I stuffed the top half with polyester fill and then added the lizard litter and hand sewed the opening.  The change worked just fine and the birds were nicely weighted at the bottom by not too heavy.

Although they were quite cute at that point, the little partridges still needed a little decoration.  I added sequins for eyes and wool pom poms glued to sewing pins or jewelry wire to finish things off.


All told the project was fairly time consuming given the diminutive size of the results.  I think they would look good tucked into a holiday wreath, also I'm considering leaving one or two on a co-workers desk for a little holiday cheer.  Imagine adding a bird to a holiday gift basket or putting one on top of a gift wrapped in coordinating paper.

Maybe I'll think about making some pears in the same fabric.  Maybe next year.

Tuesday, December 3, 2013

Sweet Silver and Gold Necklaces

Christmas Gifts
A few weeks back I went to the Los Angeles Gift Show and picked up some supplies to put together necklaces for Christmas gifts.  My vendor came with a great selection of chain, supplies and findings.  I was excited to get home to start putting things together.

I picked up a few yards of chain in varying sizes and metal tones. That way I could mix and match it with the charms I was putting together.  Inevitably some of the decisions I make while picking out my selections change by the time the project is done.  My practice is to buy a little extra of everything, so I have the flexibility to make changes if I want to. Having a little extra also prevents extra ordering or trips to the vendor.

Three charms
 In addition to the necklaces, I made a few bracelets with some chunky rolo chain.  I like to use rolo chain in small or large gauge.

Bracelet for a dog lover

When I showed my purchases to my 12-year old niece and asked her to guess which things I selected for my two sisters, her aunts, she guessed correctly.  Not bad since her aunts both live many states away from her.  I'd say it is a testament to the time my sisters spend connecting.  I wonder if my niece could pick one for me.  That's easy because I like them all.

Sometimes I like to hang a few charms from one necklace.  Other times I like to mix up a few chains on the same piece.  Also I like to wear multiple necklaces with different length chains.


Looking for a gift this holiday?  Check my Etsy site for the necklaces above.
 https://www.etsy.com/shop/pearlscottage?ref=si_shop


Monday, November 11, 2013

Pickled Vegetables are Easy to Make


Pickled vegetables are colorful, flavorful, and delicious!  When I was at Tom Douglas' Lola restaurant in Seattle, I enjoyed one of his delicious spreads with pita bread and on the plate was a little bowl of julienne pickled vegetables.  They were a nice addition to the plate and added a little punch to the plate.  They also went well with the martini I was drinking.

Of course, I immediately started thinking about making my own pickled vegetable. I looked at recipes and settled on one by Susan Feniger and Mary Sue Milliken of Border Grill, Ciudad and Street restaurant fame.  I made mine with carrots, cauliflower, red peppers, summer squash, and cucumber.  RECIPE
Cooked in boiling water and cooled in a water bath
The process took a little more time then I anticipated, but it was easy to do.  I pickled carrots, cauliflower, red pepper, summer squash and pickles all together.  Here is my finished product.
I have six 1-quart jars that will stay fresh in the refrigerator for the next month.  Maybe next time I will look for a recipe that utilizes the canning process so that I can store them in the pantry and eat them over a longer period of time.  That is if I still want pickled vegetables after eating six quarts of them.

If you are a pickle lover, stop by Joan's on Third in West Los Angeles for lunch.  She makes the most delicious pickles.  I dream of the short rib sandwich and a side of pickles from Joan's.  My plan is to make pickles that good some time soon.
Delicious pickles form Joan's on Third
Short rib sandwich that is so good it was featured on the cover of Bon Appetit magazine
  If you like pickled food, jump in and make your own pickled vegetables.  It's easy, cheap and delicious.

Thursday, November 7, 2013

Linen and Cotton Throw Pillows

My business partner, Michelle, and I were trying to find our niche in the retail market.  One item that sold well was linen, cotton, and burlap throw pillows made with a floral embellishment in the same or coordinating fabric. 

We found that although they were popular, we didn't charge enough to make them worth our while.  A friend of mine bought three of them for her recently redecorated living room.  Every time we see each other she comments how much she loves the way the pillow look in her home.

These linen and cotton pillows are not difficult to make and they add texture to a vanilla color scheme.

I made a pieced quilt in red, white and blue that I throw over my slip-covered love seat.  With left over fabric I made a few throw pillows.  The first pillow with the circles is a shout-out to Anthropologie.  As I cut, ironed and sewed, I praised the workers who made more than the one pillow I put together.
 My other pillow is an antique tea towel surrounded by my quilt fabric.  The embroidery is beautiful and the colors really pop.  I am a sucker for anything with a bird on it too.
Let me know what pillows you've made or like.

Friday, November 1, 2013

Vintage Shelves Are Great For Displaying Treasures

This shelf is the first thing that I painted.  After the shelf I moved on to bigger furniture items.  I wish I had a before picture when it was a dark wood, which was pretty, but of course I wanted to paint it white.  It has screws in the back which holds the entire thing together.  When I bought it I didn't notice the screws and planned to just paint away, which would have been a nightmare getting into all the little cubbies. 

Thankfully I took the back off after I removed the screws and all the little parts just slid out.  If it didn't come apart, it might have been the last paint project that I attempted.  On went the primer and the paint and soon it was ready for reassembly and distressing.

Using Annie Sloan Chalk Paint is an option that will cut out the priming step, however a final wax coat will be needed.  I think the shelf would look good in all sorts of colors.  The shelf holds all sorts of decorative treasures like perfume jars, old postcards sent from Europe to America, and a prayer book that my grandmother gave my uncle when he was a little boy.  I've added shelves to other areas in my house like the one below that hangs by my front door.  I caught my daughter putting her make-up on there before she ran out of the house the other day.
I put a painted bookcase on the wall of my kitchen because it was the right size.  I filled it with milk glass because I like the white color against the mid-tone paint.
See the bookshelf in the corner
Interesting shelving is hard to find.  When I see a piece I like, I usually buy it and find an empty wall in a bedroom, bathroom, kitchen or hallway.  They are nice to have where people pause or sit because it offers the opportunity to appreciated collected pieces. 

My business partner, Michelle, has all sorts of shelves filled with beautiful things.  She has a talent for displaying items so I often copy her ideas.  Michelle's grandfather made the lovely shelf below.   Look carefully at the top where there are two little birds on the shelf backing.  He made all sorts of custom items for her house before he passed away.  Not only are they beautiful shelves and furniture items but a wonderful memory of her grandfather and his talent.
Michelle's kitchen shelf made by her grandfather
Shelves are decorative on their own and provide practical and pretty ways to display collectables and practical things.


Friday, October 25, 2013

Drop Cloth Tablecloth - Practical, Pretty and Inexpensive


Supplies: 
  • Drop cloth from your local DIY store, sized 18" longer and wider than the table to allow for drop and hems on both sides.  They come in all different sizes.
  • Lace or other embellishment 
  • Sewing machine and notions including a needle for heavy jobs
Instructions
First wash and dry the drop cloth on a permanent press cycle. It will come out of the dryer with wrinkles so the next step is to iron it.  It is very strange to iron something that is made to collect messes.

Measure your table top and cut the drop cloth 18" longer and wider in the length and the width.  Maintain as much of the existing hem area as possible.  It is helpful to use a cutting mat and a rotary cutter, however scissors will work just fine. 


On the two unhemmed sides, iron the two sides with that need hem seams.  Fold under half an inch and iron and then fold under again another half inch.  If your table is round, simply measure your table top, cut the measurement in half, and add 9".  Then find the center and hold your fabric measuring tape there (best to do with a helper) and measure out and mark the spot.  Continue moving the end of the tape and marking while holding the other end in the center.  Soon you will have dots that make a circle.  Connect the dots and your fabric is ready to cut out.  The entire edging will need to be hemmed.

Use a heavy needle to sew your ironed hems.  It's so easy!


Then sew your lace or other embellishment on the table cloth.  I had a really long piece of lace that I sewed all the way around the edging.  Another idea is to run trim down the center.  Multiple rows of different lace or trim would be pretty.  May either use a stencil and white paint or a silver Sharpee pen.  I tried a black marker and it was just a little too dark for me.

If you find you have extra drop cloth fabric, consider making a runner.  Next I'm going to make one for my kitchen counter with quotes written around it.

Show me what you have done with drop cloths!

Tuesday, October 22, 2013

Old Jewelry Made New


When I go to estate sales I gravitate to the jewelry table and specifically the pins.  Something about the shimmer and shine makes me want to pick them up and think about the women who once wore rhinestones and furs.  Did they wear these beautiful jewels to tea, church, dinner parties, work?

In an effort to wear pins today and not look like I live in the 1950's, I turn them into pendants.  Some pins lend themselves to hanging more than others.  Last week I made this necklace with a some beaded chain, the pin, a few jump rings and a clasp along with jewelry pliers and some reading glasses since I need a little magnification assistance.


I think the finished length ended up about 22 inches.  I have worn my new necklace alone and layered it with longer and shorter necklaces.  When i visited my sister in San Francisco she said she wanted one like it, so I need to either give it to her or disappoint her since it's one of a kind.

Here are a few pictures of other pendants I have put together in the last few months.  When rigging things up, I check to see how the pin is hanging; it needs to lie flat against the body instead of side to side.  By adding an extra jump ring the problem is usually solved.  The other issue that occurs is the pin tipping too far forward. Experiment with different size jump rings to balance things.  I usually have lots of sizes on hand including extra, extra large ones.

All it takes is a little imagination. If things don't turn out quite right, I simply change whatever is not working. Next up is a bracelet made from some jet beads from two broken necklaces that I picked up for a song. Please visit Pearl's Cottage again to see what's going on next time.

I must like long pendants because I just noticed that everything posted is 22" to 36".

Wednesday, October 16, 2013

Painting Furniture - My Latest Obsession


Before you notice, I'm going to admit that I get a bit obsessive about a project or a or a "thing" and I like to do it all the time, until I move on to my next interest.  Right now that thing is painting beautiful, old furniture. You've seen it.  It has lovely details and hardware, it's really heavy, and painting it white has been all the rage. Well I was late to the party so I'm having a great time now.

First, I finally got around to painting a chair I picked up at an estate sale in Long Beach more than two years ago.


Then I painted the frame and drawers of a sideboard and stained the top dark with a matte varnish finish to protect it.  I just love the contrast.

Before and after:


Now I've moved on to a dresser for my daughter.  I wanted to finish decorating her room around some bedding I made and the color scheme was quite trendy so I opted to for a Granny Smith green apple.  She is college age so she needs a contemporary feel to her vintage furnishings.

Here is a picture of the "before" dresser with a crackle finish on it. Yes, it is hideous, but admit it, the piece has good lines, details, and hardware.

My first step was to take off all the hardware and put it in a big ziplock bag then put it somewhere safe.

Next I sanded everywhere I could with a power sander. I have to do it everywhere because of the uneven crackle finish. On other items  I hit the bad spots with the power sander and the rest with sandpaper.  I used everything from 100 grit to 220 grit.  Lots of dust from this job so I covered up with a dust mask and safety glasses.  Hand sanding worked best in the corners and details of this dresser.  Since I want a fresh look, I made sure I had a nice finish.

After the dresser was all sanded, I primed it with a shellac based primer.

Remember if there is an issue that bothers you before you paint, it will be magnified when a sheen, glaze or wax goes on it.  A big scar may need to be embraced instead.  If the piece has a shabby chic look then don't sweat it.

Wipe down the piece with a damp cloth to remove dust. Another good option is to go over the finish again with a cloth dampened with paint thinner or a tack rag.

Then start to paint away.  Use a small roller with a 1/4" nap called a cabinet finish roller.  This is my new favorite tool.  For a beautifully smooth finish, this little baby is the best!  I used a latex paint with a low sheen finish.

My next painting project is a dresser for my master bedroom.  I love the beveled mirror.  The finish has a bit of wear and tear, but that doesn't matter since I'm going to paint it.  Should I keep the top stained?  Let me know what you think?